Wednesday, June 11, 2008

Bluetooth INFO - control and read another phone via Bluetooth

Using this software you can control and read informations from other phone (Via Bluetooth). Most commands work if you are connected to a SE phone. Use this tool to Format suported mobiles and much more.

You can install this on .jar supported mobile phones.

Note : You can't use this software as a Mobile Bluetooth Hacking Tool. Because you have to pair both mobile phones using same pass key. The applications are free to copy and it is prohibited to sell them.


Screen shots (captured on 6600)


Wednesday, June 4, 2008

Configure Gmail On Your Mobile phone to receive and send e-mails

Configure your Nokia or other models of mobile phones to receive and send e-mails from your Gmail account. To set up your mobile phone, simply follow these steps.

E:G :- Gmail configuration on Nokia 6600

  • Enable pop3 access of Gmail Account - Look inside Setting and POP forwarding Options on gmail web site
  • Follow these steps
Messaging -> Options -> Settings -> E-mail -> Mailboxes ->


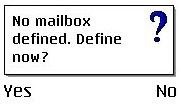
  • Choose Yes. Press start to continue and fill this.
Mailbox name - Gmail
Access Point in USE - use your GPRS access point
My e-mail address - use your e-mail address (*****@gmail.com)
Outgoing mail server - smtp.gmail.com (Port: 465 or 587 )
Send Message - During next conn.
Send copy to self - Yes
Include signature - No
User name - Your user name
Password - Your password
Incoming mail server - pop.gmail.com (port - 995, SSL)
Mailbox type - pop3
Security - TLS (Scroll down to security port and choose SSL/TLS If you have it)
APOP Secure login - on

  • Back and select your Mailbox in use

Note : You can only send e-mail on Nokia 6600 or phones like that because that phones don't have SSL protocol on firmware.

If your phone supports the SSL/TLS, you can both send and receive e-mail .


You can try Gmail using gmail.com/app web site to download software for your Phone supported.


SSL/TLS supported - N73, N95,


E:G :- Gmail configuration on Nokia N73


Messaging -> Options -> Settings -> E-mail -> Mailboxes ->


Yes -> Start -> POP3 -> Next


My e-mail address - use your e-mail address (*****@gmail.com)
Incoming mail server - pop.gmsil.com
Outgoing mail server - smtp.gmail.com
Access Point in USE - use your GPRS access point
Mailbox name - Gmail


Now your mailbox settings are complete. After this go back and your created Gmail account and edit the following.


Edit -> Connection settings -> Incoming e-mail

User name - [your user name]
Password - [your password]
Incoming mail server - pop.gmsil.com

Security (Ports) - SSL/TLS
Port - 995 , ( SSL)
APOP Secure login - on


Edit -> Connection settings -> outgoing e-mail


User name - [your user name]
Password - [your password]
Outgoing mail server - smtp.gmail.com

Security (Ports) - SSL/TLS
Port - 465 or 587
APOP Secure login - on

Wednesday, May 28, 2008

Mobitel GPRS, WAP and MMS Settings

GPRS Settings (just ISP)
  • Access Point Name (APN): ISP


WAP Settings
  • Data bearer : Packet data
  • Access point name : isp
  • Authentication : Normal
  • Homepage: http://wap.mobitel.lk
  • Network type : IPv4
  • Phone ip address : Atomatic
  • Proxy serv. address : 192.168.050.163
  • Proxy port number : 0


MMS
Settings
  • Connection name - MobitelMMS
  • Data bearer – Packet data
  • Access point name - wapmms
  • Authentication - Normal
  • Homepage - http://192.168.50.165
  • Network type : IPv4
  • Phone ip address : Atomatic
  • Name server : Atomatic
  • Proxy serv. address : 192.168.050.163
  • Proxy port number : 8080

Thursday, May 1, 2008

Show video clips during video chat

You can use this video cameras in video chat or video conference software like ICQ, Yahoo Messenger, MSN Messenger, Skype Video, Camfrog, AOL AIM, Pal Talk, or whatever... and to broadcast it to many users at a time.

SplitCamera is a freeware virtual video clone and split video capture driver for connecting several applications to a single video capture source.


How to use this?


1) Click here to Download free setup file


2) Run the installation package by double clicking it with your mouse.When you run SplitCam for the first time you will be prompted to install a driver for the virtual video camera. Answer “Yes” to all questions during driver installation.


3)
1. Start SplitCam if it's not running

2. Click the File menu and select your web camera from the Video source submenu

3. Click the Play button on the playback control panel

4. Start your video conferencing software if it's not running

5.
Select SplitCam capture as a video source in the conferencing software, consult the software documentation on how to change the video source in it